前言
当使用 1Panel OpenResty 的时候时,OpenResty 默认是 Host 模式。但是这对我们使用反向代理不是非常的友好。 如果使用默认的 host 模式的时候,就需要其他的 docker container 将端口映射出来。
但是在使用 docker container 映射端口的时候,系统自带的 iptalbes 防火墙无法拦截指定端口的数据包(docker接管了iptables,使得端口映射能够生效)。
所以为了保持其他 container 的安全,不将其端口映射出来,就需要更改 OpenResty 网络模式从 host -> bridge。
设置网络
1Panel 在安装的时候,默认会创建一个bridge 网络。我们直接使用这个网络即可。如果没有,则自己创建一个bridge网络。
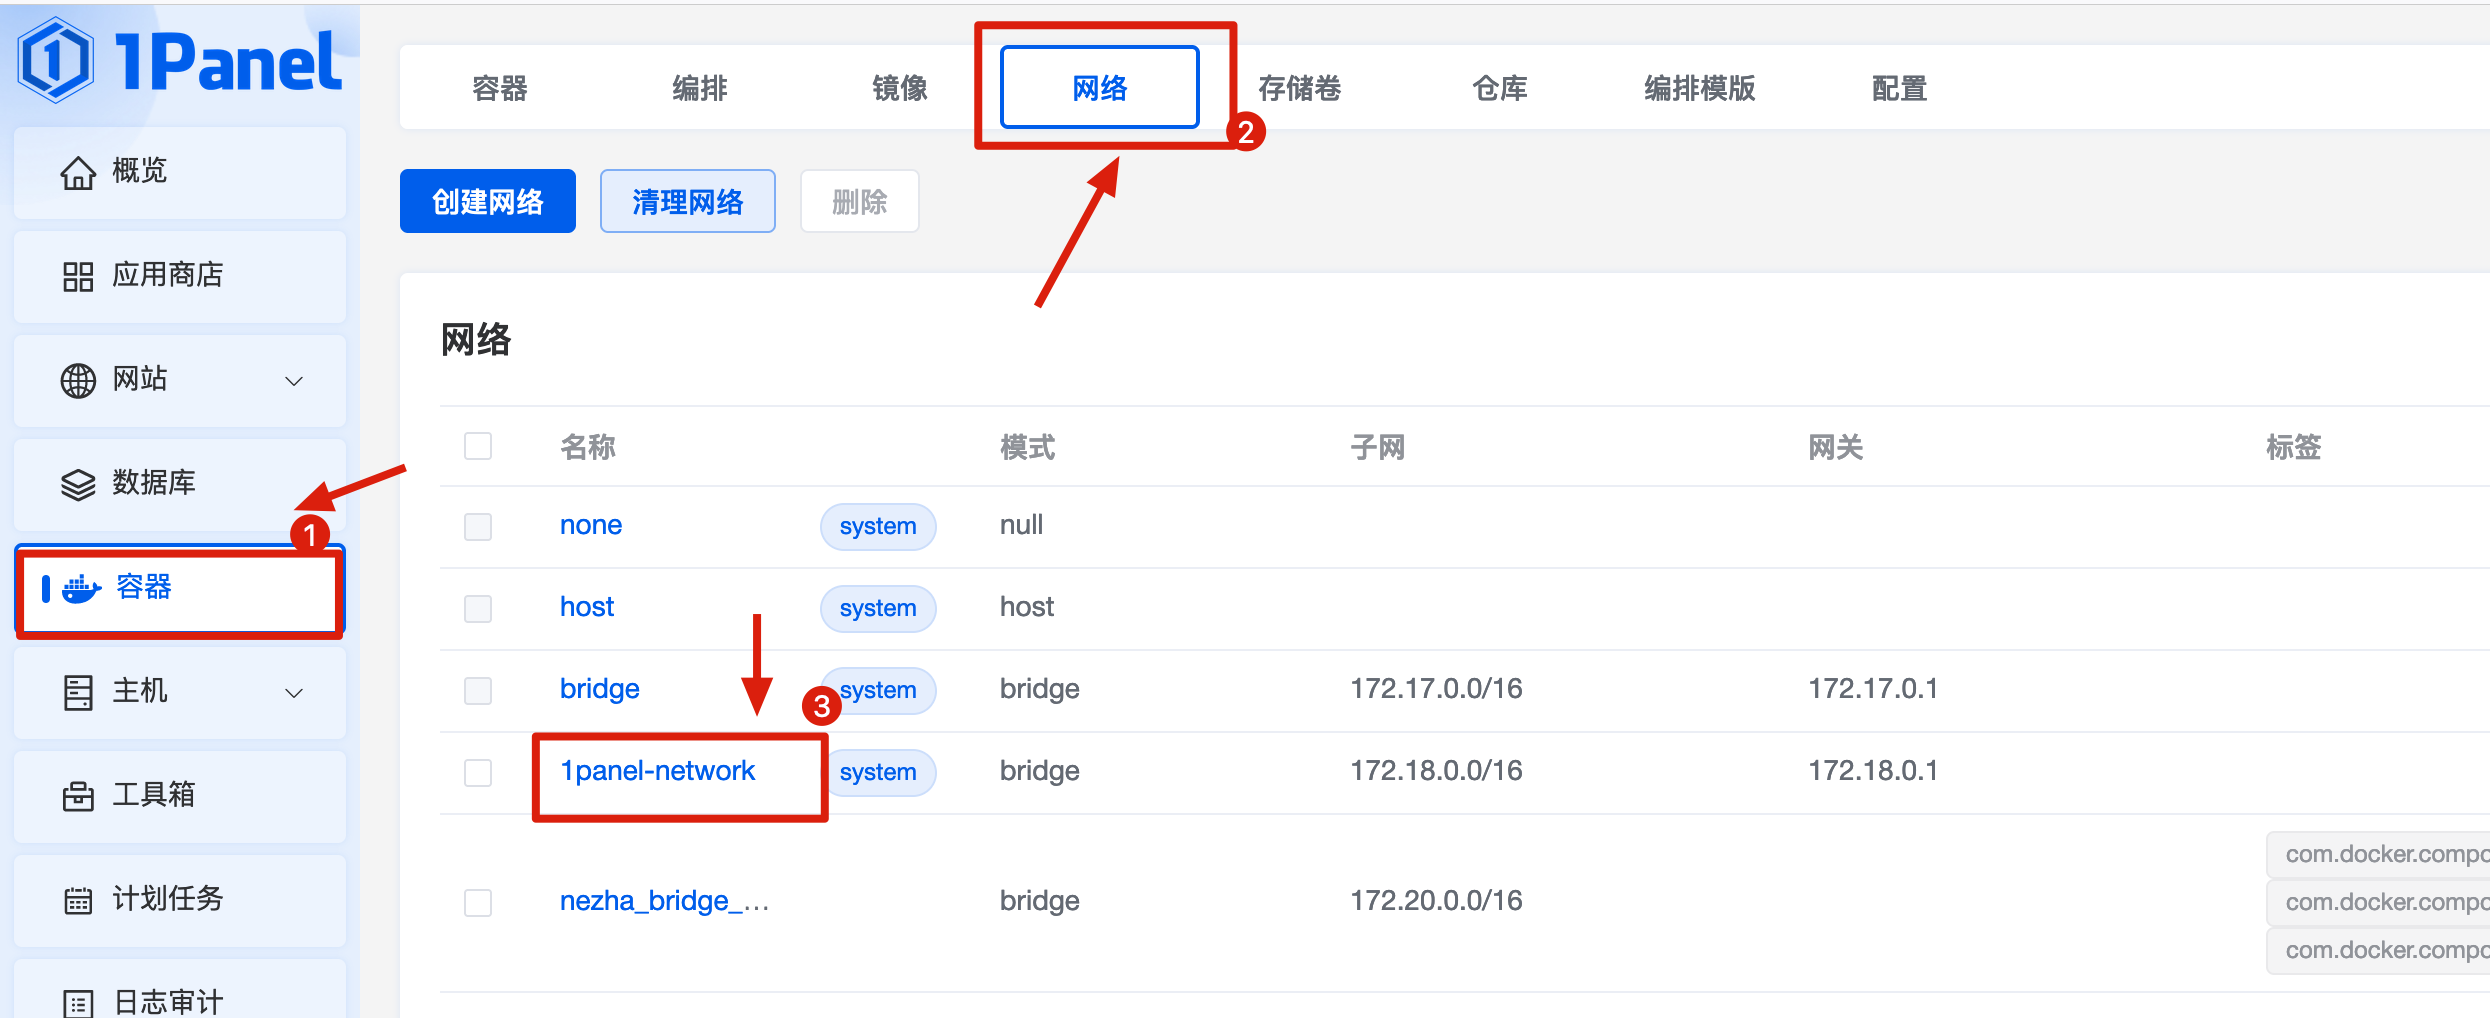
注意:千万不要使用 docker 自带的 bridge 网络。因为其不支持 别名 功能。即不能通过 container 的名称,获取对应的 ip 地址。
更改 OpenResty 的默认设置
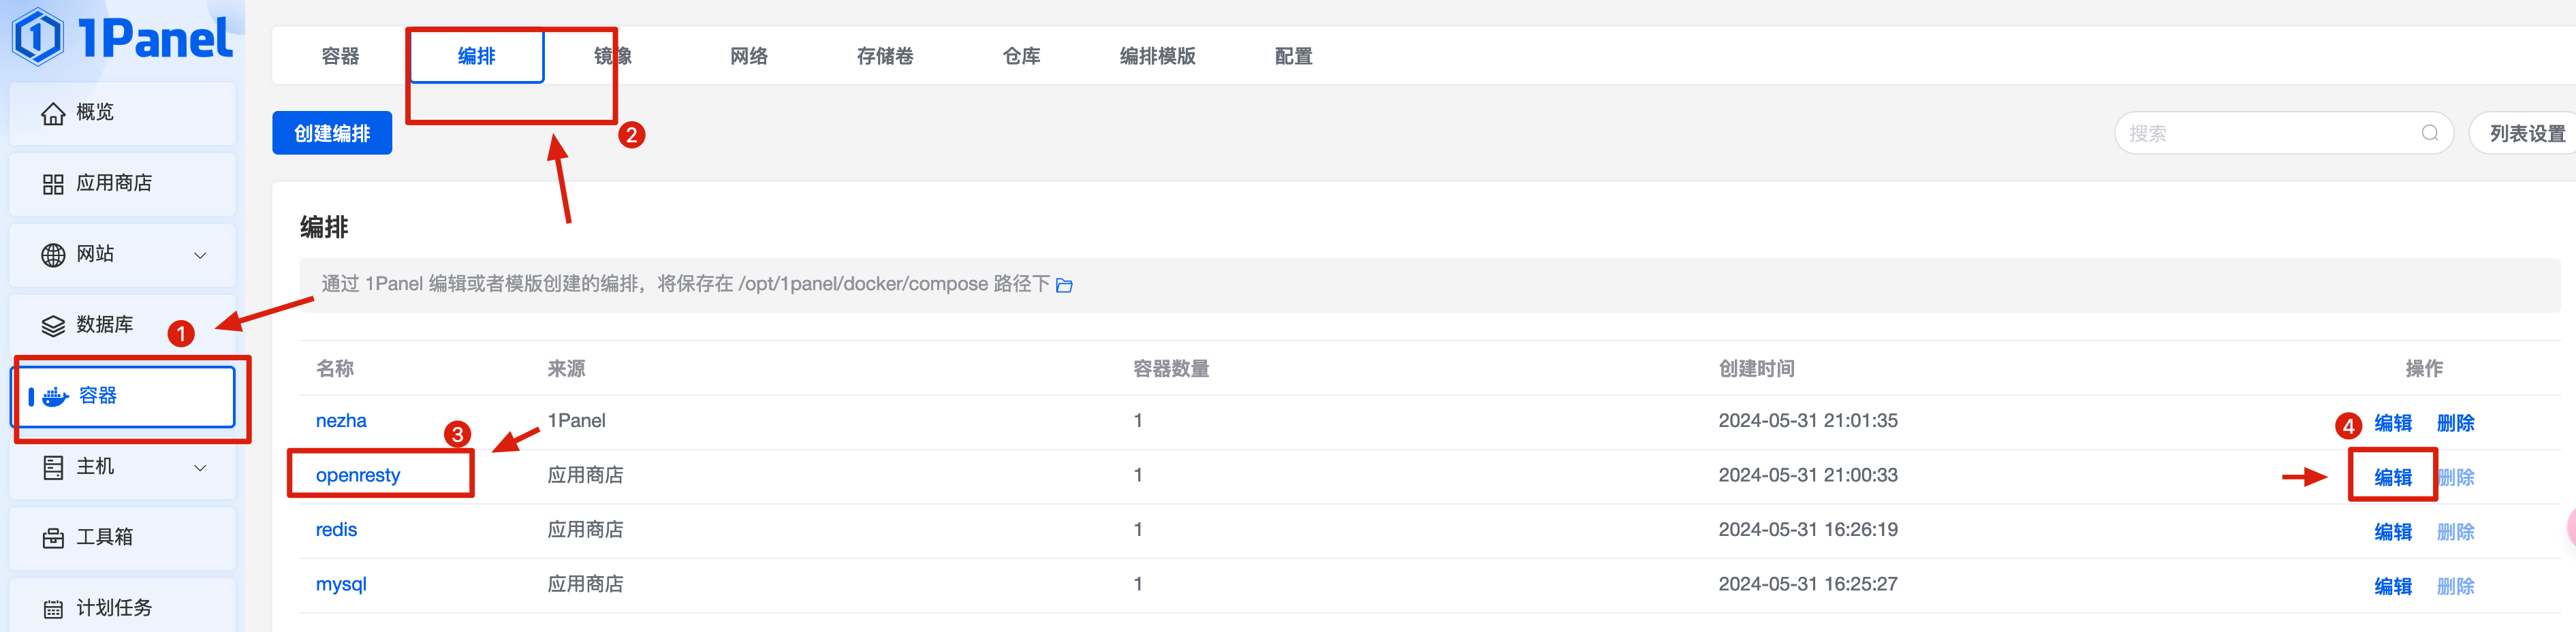
将其 docker-compose 替换为下面的内容
1
2
3
4
5
6
7
8
9
10
11
12
13
14
15
16
17
18
19
20
21
22
23
24
25
26
27
28
29
30
31
32
33
| services:
openresty:
container_name: ${CONTAINER_NAME}
deploy:
resources:
limits:
cpus: ${CPUS}
memory: ${MEMORY_LIMIT}
image: 1panel/openresty:1.21.4.3-2-2-focal
labels:
createdBy: Apps
restart: always
volumes:
- ./conf/nginx.conf:/usr/local/openresty/nginx/conf/nginx.conf
- ./conf/fastcgi_params:/usr/local/openresty/nginx/conf/fastcgi_params
- ./conf/fastcgi-php.conf:/usr/local/openresty/nginx/conf/fastcgi-php.conf
- ./log:/var/log/nginx
- ./conf/conf.d:/usr/local/openresty/nginx/conf/conf.d/
- ./www:/www
- ./root:/usr/share/nginx/html
- /etc/localtime:/etc/localtime
- ./1pwaf/data:/usr/local/openresty/1pwaf/data
ports:
- "80:80"
- "443:443"
networks:
- bridge
networks:
bridge:
external: true
name: 1panel-network
|
之后,docker 会重启 OpenResty 容器。
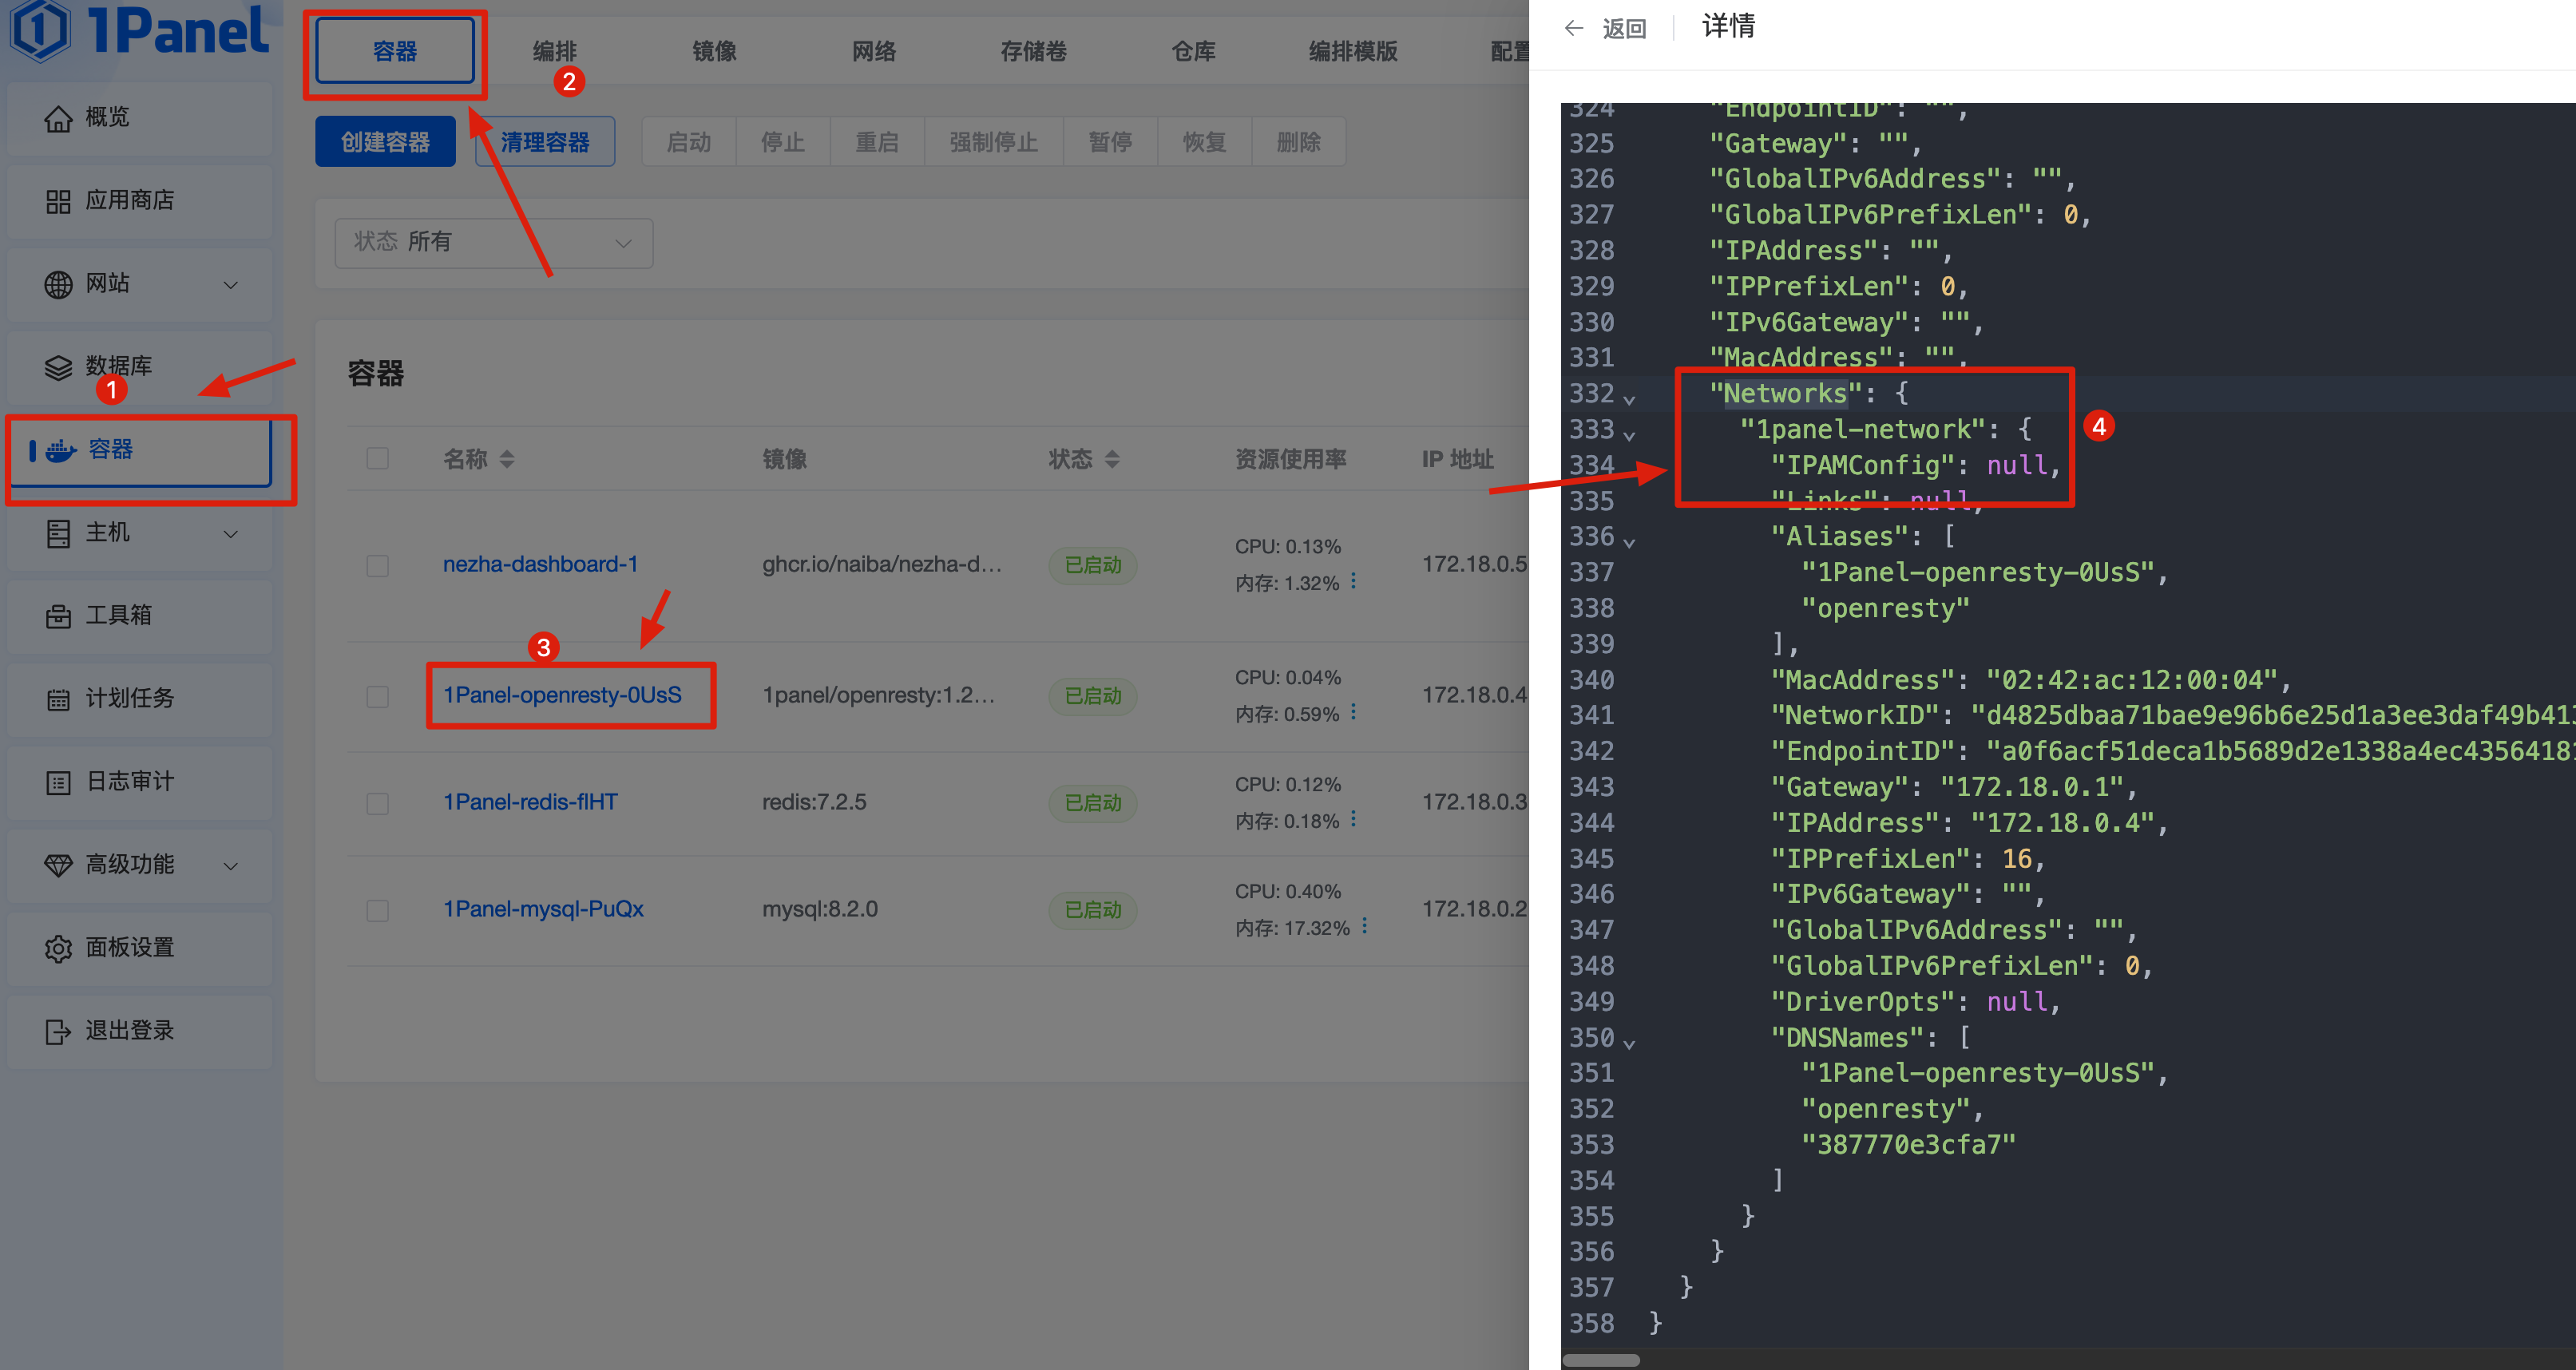
如图所示,Networks 变为 1panel-network,就说明操作成功了。